This is an installation guide for how to install the AUTOMATIC1111 WebGUI (mainly as a reminder for my future self). I have tested installing on Windows 10 & 11 and I plan to try to install on my Macbook as well to provide a guide on that. Most of this information has been taken from Rentry.org but I have added information or clarity were I feel appropriate.
Windows Installation 
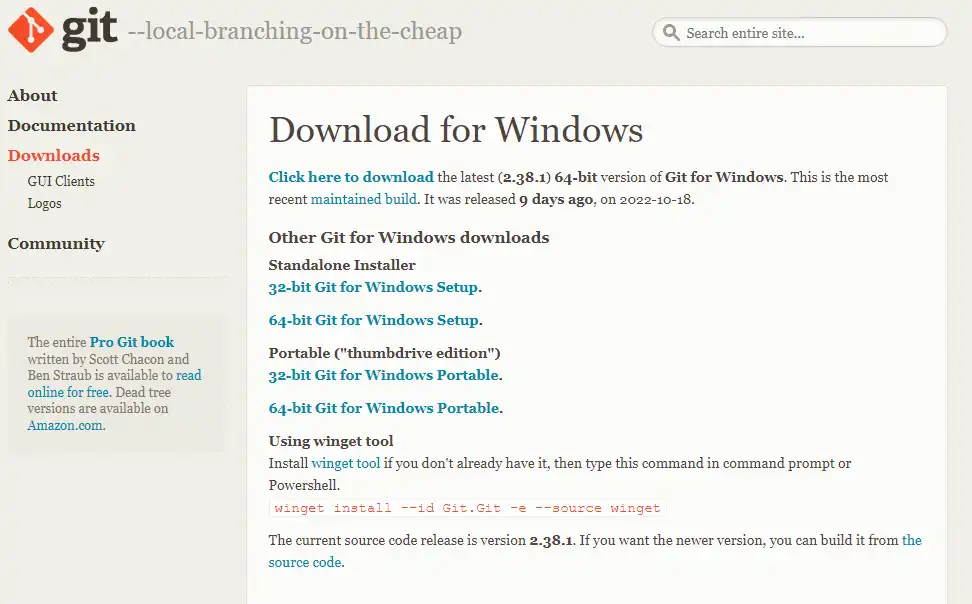
Step 1: Install Git
Choose one of the standalone installers from the Git download page.
When installing, make sure to check the box for 'Windows Explorer integration -> Git Bash'
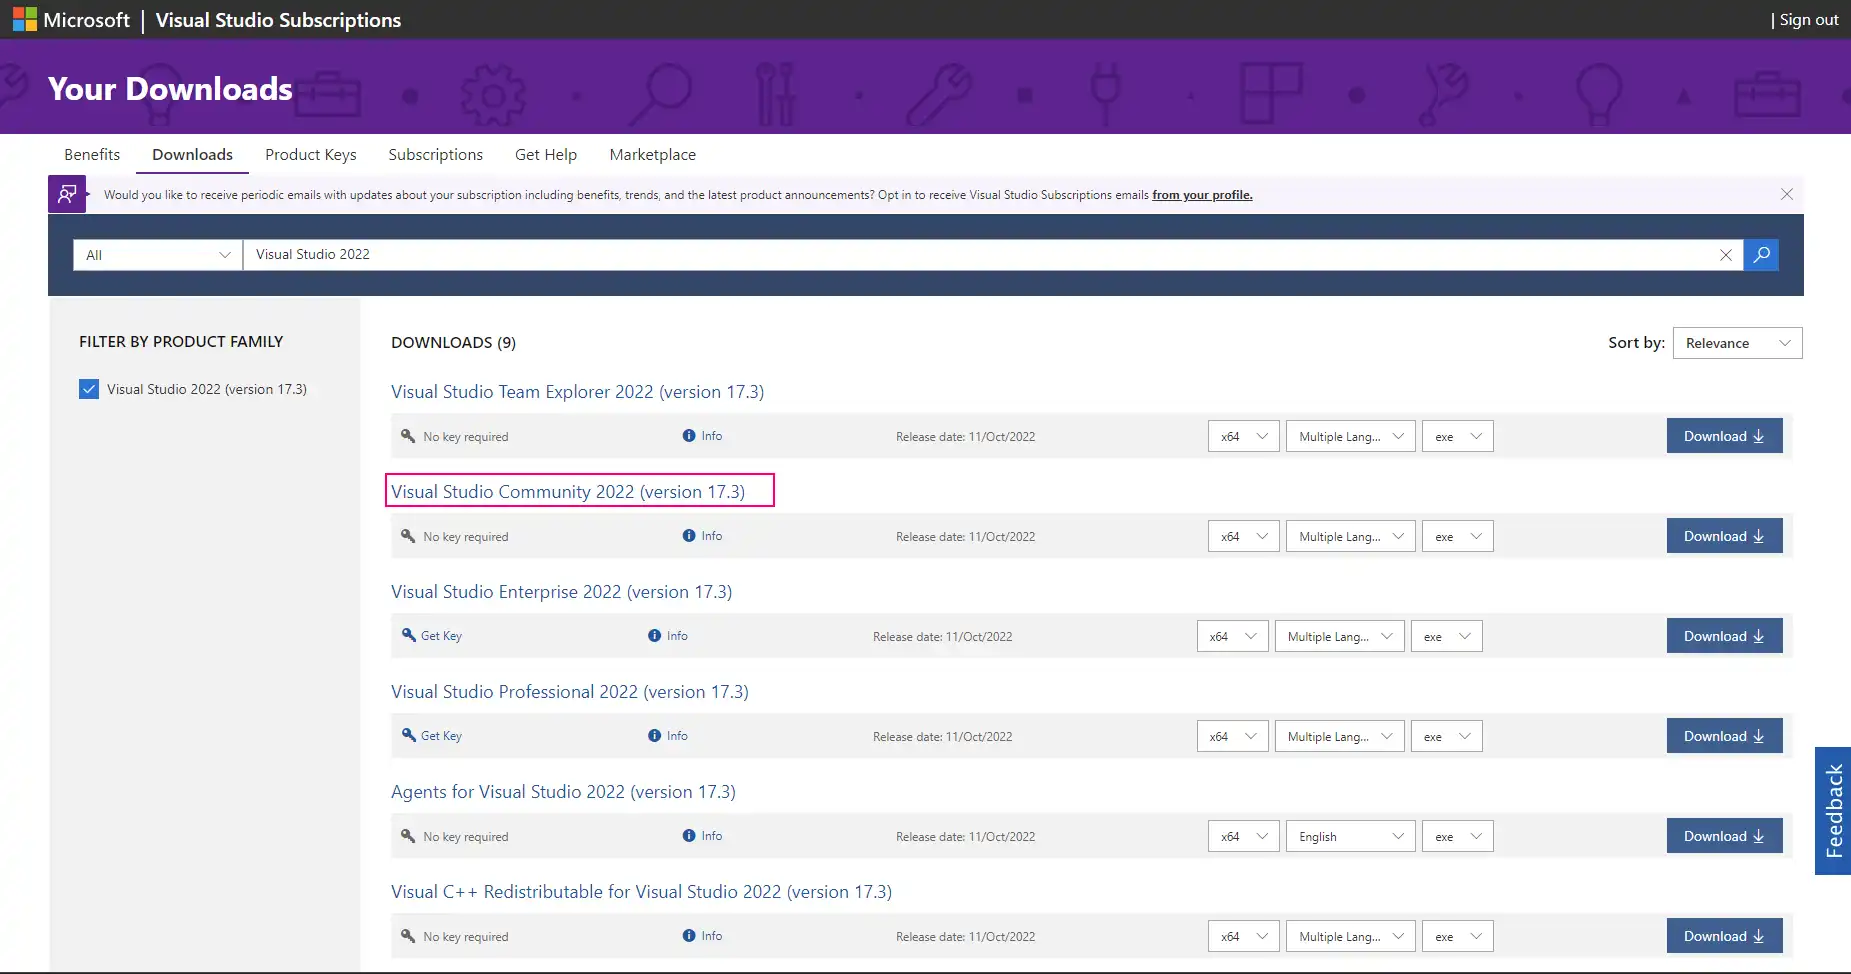
Step 1.5: Install Visual Studio and VS Build Tools (optional)
This step is optional and I have only stated it here because I ran into errors trying to run the WebGUI without including this step, however you should be able to install the WebGUI without this step. Only do this if you have problems with installing & running the WebGUI.
Go to the Visual Studio download page (Microsoft login required) and choose the appropriate Visual Studio for your PC. For example, on my Windows 11 PC, I chose 'Visual Studio Community 2022' x64 exe version. Also download the 'Build Tools for Visual Studio 2022' from the same page.
Once both are downloaded, install the Visual Studio Community 2022 (or your version) first and make sure to follow the prompts and add any python libraries and components. There are a lot of options to choose from and I am not sure which exact ones are needed so choose as much as you can related to python but you download size should not be bigger than a gigabyte.
Next install the Build Tools which should be an easier process. Once those two installs are done, continue onto the next step.
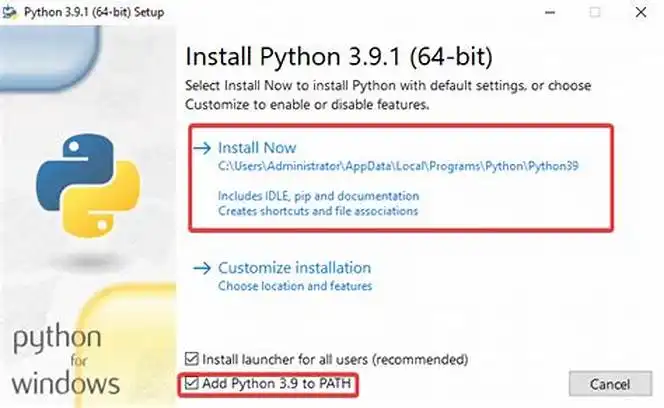
Step 2: Install Python 3.10
You must install Python version 3.10 as other Python versions are not guaranteed to work. Click here to download version 3.10.6. For Windows 7 users you will need to download this version. For the latest Python version and all previous versions, you can find them on the Python website.
Run the Python installer and make sure "add to PATH" has been ticked on the first screen of the installer & tick 'install launcher for all users'. The rest of the installation process should be simple.
Step 3: Clone the WebGUI repo to your desired location
With Git & Python installed, you can open your windows explorer and create a new folder anywhere you like (don't use spaces in the name). Then open up that folder, right-click and choose the option 'Git Bash here' or similar. On Windows 11 this option might be hidden under the 'show more options' button.
This should open up a terminal window. In the screenshot below I am using the default terminal that comes with your Git installation.
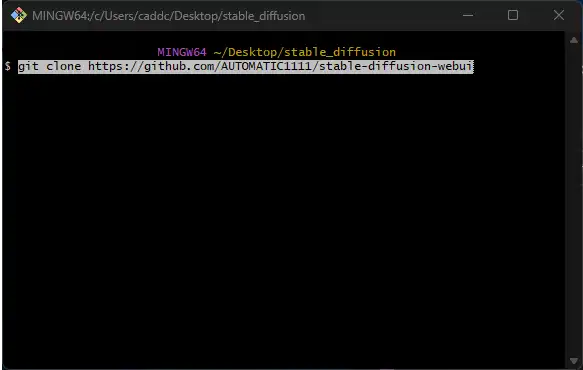
Once the terminal is open, copy this text (Click to copy)
Installing the repo should be completed in a short amount of time <1min. Once complete, you can close the terminal.
Step 4: Download a .ckpt model
Once you have cloned the WebGUI, you'll notice a few folders in the webGUI folder. One will be named 'models' & then a folder within called 'Stable-diffusion' and as the name suggests, this is where you will keep all .ckpt files like Stable Diffusion and Waifu Diffusion.
You can add any model files to this folder, but for the installation to work, you must rename 1 of the model files to 'model.ckpt' as that is the default model the WebGUI will attempt to load.
Links to the most popular models can be found on my models page.

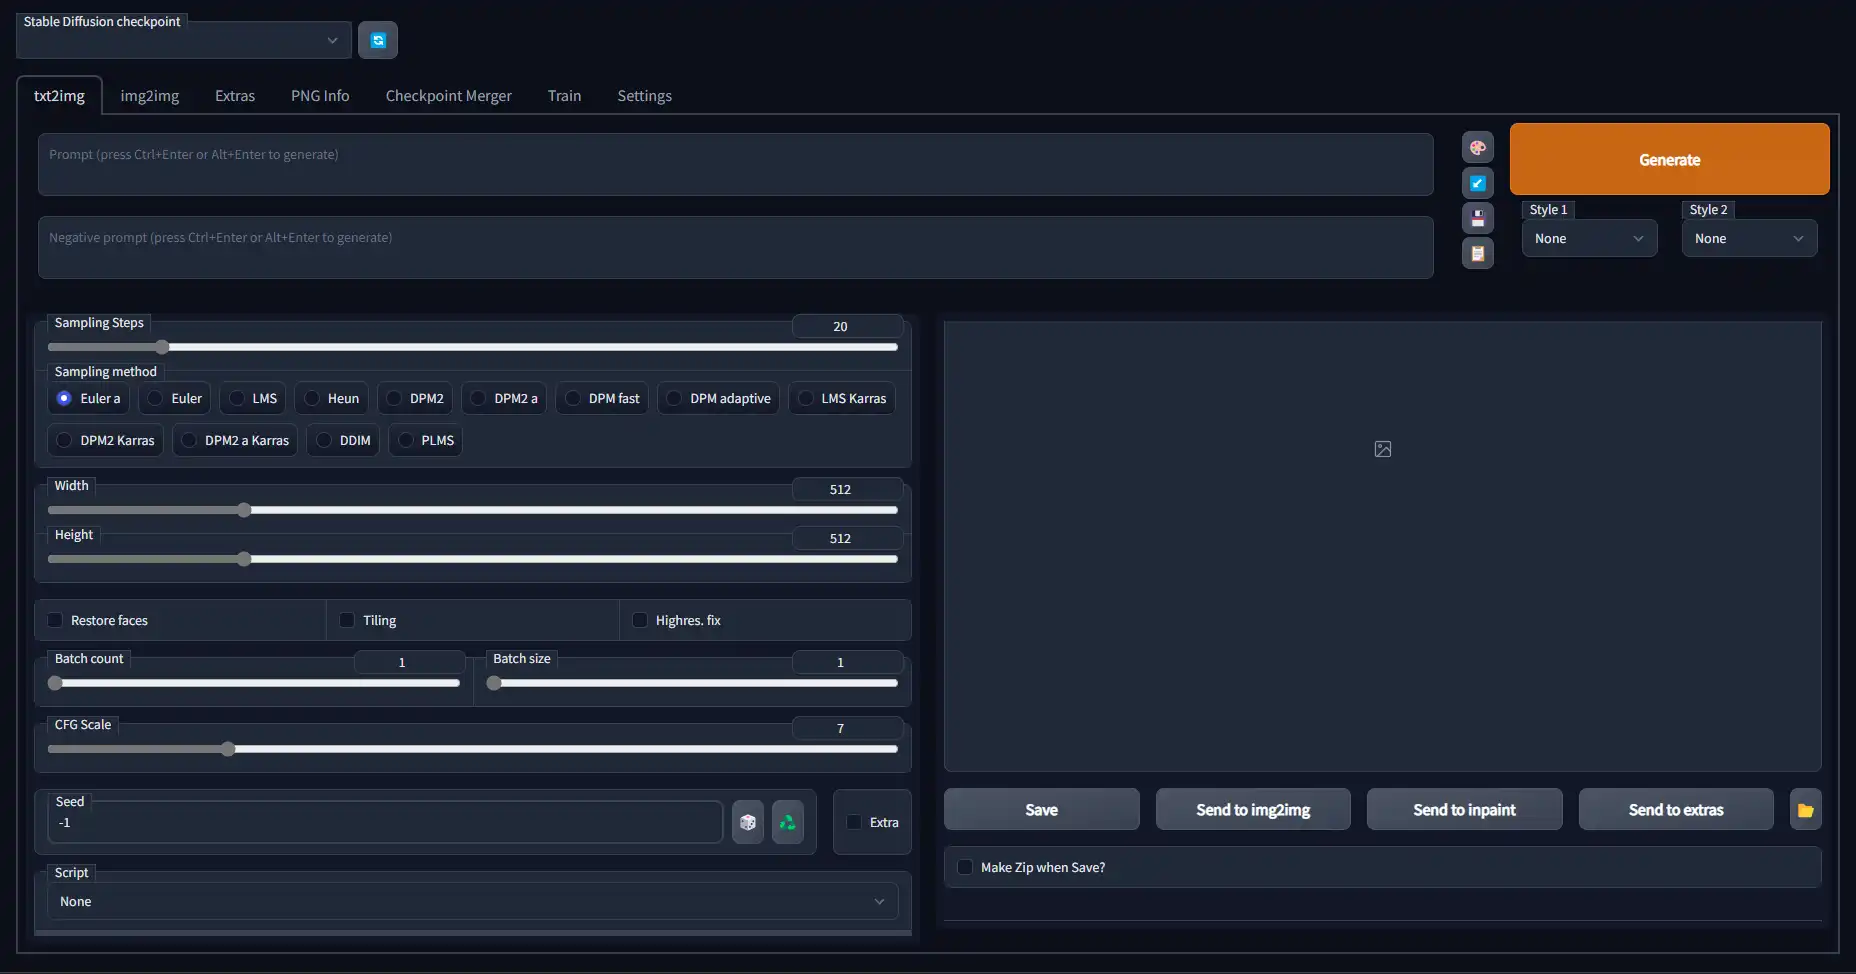
Step 5: Launch the webui-user.bat
Once you've completed the previous steps, you're almost done. Simply find the
The first time you run the .bat file it will take several minutes to download and install the required packages for the WebGUI to run. The terminal may not provide a lot of information on the download status, but be patient and wait until all installations are complete. The final line should say something like:
Once you see that line, you know the WebGUI has installed correctly and is currently running. After that you can open up any internet browser and go to the IP stated in the terminal which in this example is
Be aware that some features will download dynamically as you want to use them, like the face restoration & upscaling models. These will need to download the models on the first time you use them as they are not installed in the initial launch of the webGUI.
When you're done using the WebGUI, be sure to close the Terminal program as closing the web browser does not stop the program running in the background.
Troubleshooting
RuntimeError: Cannot add middleware after an application has started
If you encounter an error, it's likely due to an incorrectly installed Python package. To fix it, navigate to the main folder of your Stable Diffusion installation and open a terminal. Then, paste the following code into the terminal:
If the above solution doesn't work, it could be because the location of the Python.exe file is different. In this case, replace the path at the start of the command with the location of your Python.exe file.
MacOS M1/M2 Installation
Installing on M1/M2 Mac products is possible and relativly easy but it isn't as easy as installing an app normally on Apple products. It is also notable that Stable Diffusion is not optimised to work on Apple hardware, so while it will work, the processing speed & RAM usage can be much worse than on Windows even though M1 is a fast system with highspeed RAM and CPU. I believe this is due to processing taking place on the CPU instead of the GPU on Macs since current Stable Diffusion requires Nvidia Cuda cores to use GPU processing.
Originally, only Euler and DPM2 worked on macOS, but at the time of writing all sampling methods work correctly except for DPM fast (Only generates random noise), DDIM & PLMS (they both fail immediately).
For the most up to date information on macOS compadibility/ installation, you can visit this Github Page.
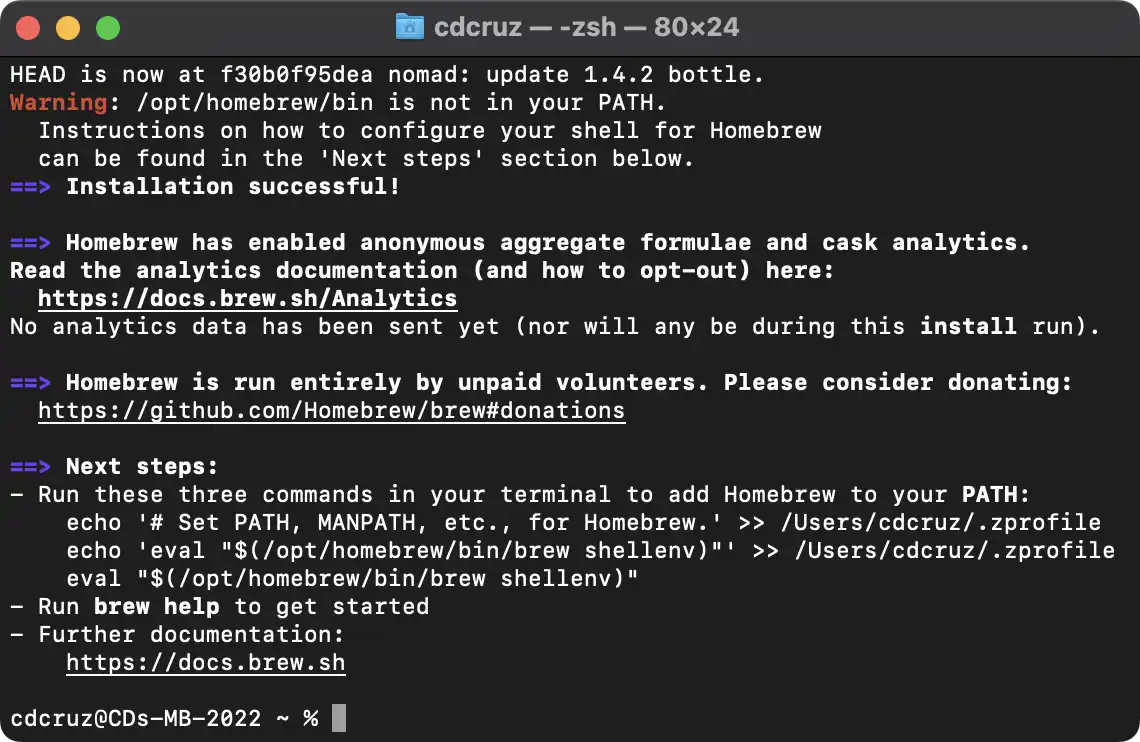
Step 1: Install Homebrew
Homebrew is a package manager for macOS & Linux that is required for the WebGUI to work on Macs.
To install Homebrew, simply copy
Step 2: Install the WebGUI from Github
Once Homebrew is installed, all you need to do is run a few commands to install the WebGUI. You should be able to install it anywhere on your PC, but for this example we will install it within the Documents folder of the Mac.
There are a few prompts that will also appear, mainly the terminal will ask you if you want to download the Stable Diffusion model as a part of the process or you can skip downloading if you would like to add your own model after the WebGUI has installed.
Step 3: Launching the WebGUI
If you're lazy like me and don't want to manually open the Terminal everytime you open the webGUI. I have figured out how to make the
It's very easy to do. Firstly, change the extension for the
If it is not working, you may be to manually open up the Terminal