Control Net is a powerful tool that enables you to control your image output and make your generations conform to other source imagery. It was introduced to the AUTO WebGUI on February 15th, 2023 and has paved the way for amazing creations, including the ability to convert videos into more consistent generations.
If you're interested in the technical aspects of Control Nets, you can visit lllyasviel's Github page for more information. For those who want to dive in and see what it can do, this page will cover the basics.
A great Beginner Guide created by Reddit user u/PantInTheCountry is a good start as well.
Getting started
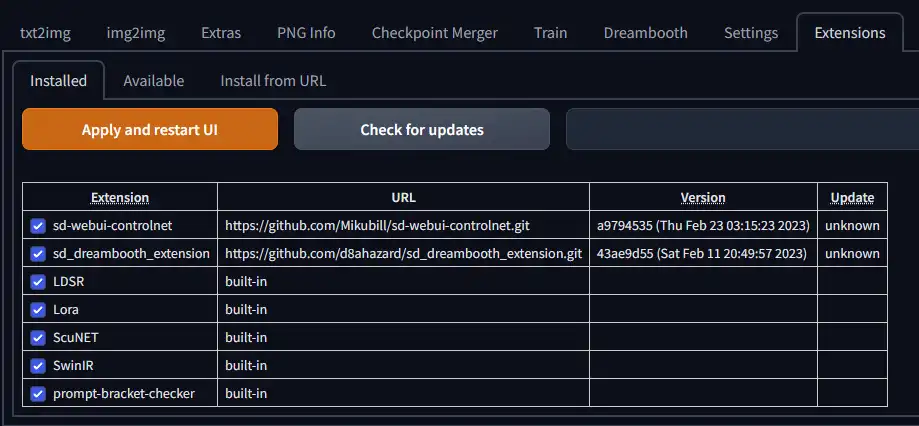
If you're using the AUTO's WebGUI, installing Control Net is very easy as it is available under the Extensions tab. Simply go to Extensions, then the Available tab, click "Load From," and "sd=webui-controlnet" should be somewhere in the list of extensions. Simply click install and reload your webGUI for the Control Net UI to appear on the txt2img and img2img tabs.
Once installed, you will still need to download the Control Net models for it to run properly. You can download the full main Control Net models here. Please be aware that they are all quite large files (around 5GB). You can download the smaller .safetensor versions here. The reduced file size does not impact the quality of generation.
Once you download these files, you will need to place them into the Control Net folder in the webGUI extensions folder. The file path should be
After this, you should be able to generate images using Control Net. There may be additional automatic downloads that occur when you generate an image for the first time. These are general .yaml files.
You can also download the models manually from Mikubill's Github page.
It's important to note that anyone can train their own Control Net model. Therefore, as with everything in AI generation at the moment, there will be many models that appear and improve upon the foundations of the main models provided.
The Basics
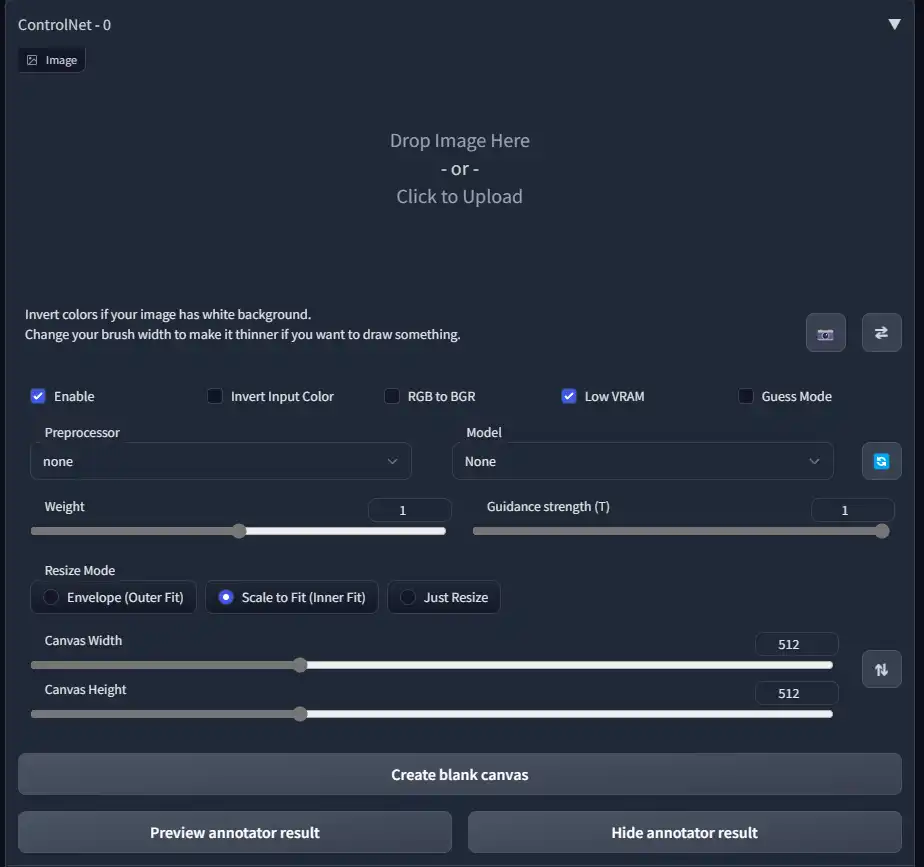
Once installed, using Control Net is very straightforward: simply add your source image, select the detection model, and generate a new image.
Make sure to tick the
If you are using a GPU with 8GB of RAM or less, it is recommended to tick the
The
Depending on the preprocessor you choose, different sliders will be available to adjust the influence or detail of the Control Net model. Although I do not have enough information on the individual models to accurately describe what each slider does, I recommend experimenting with them to see what happens.
The
It's important to note that adding Control Nets to your workflow will considerably increase generation time, especially if you start using multi-Control Nets, which will be explained in the next section.
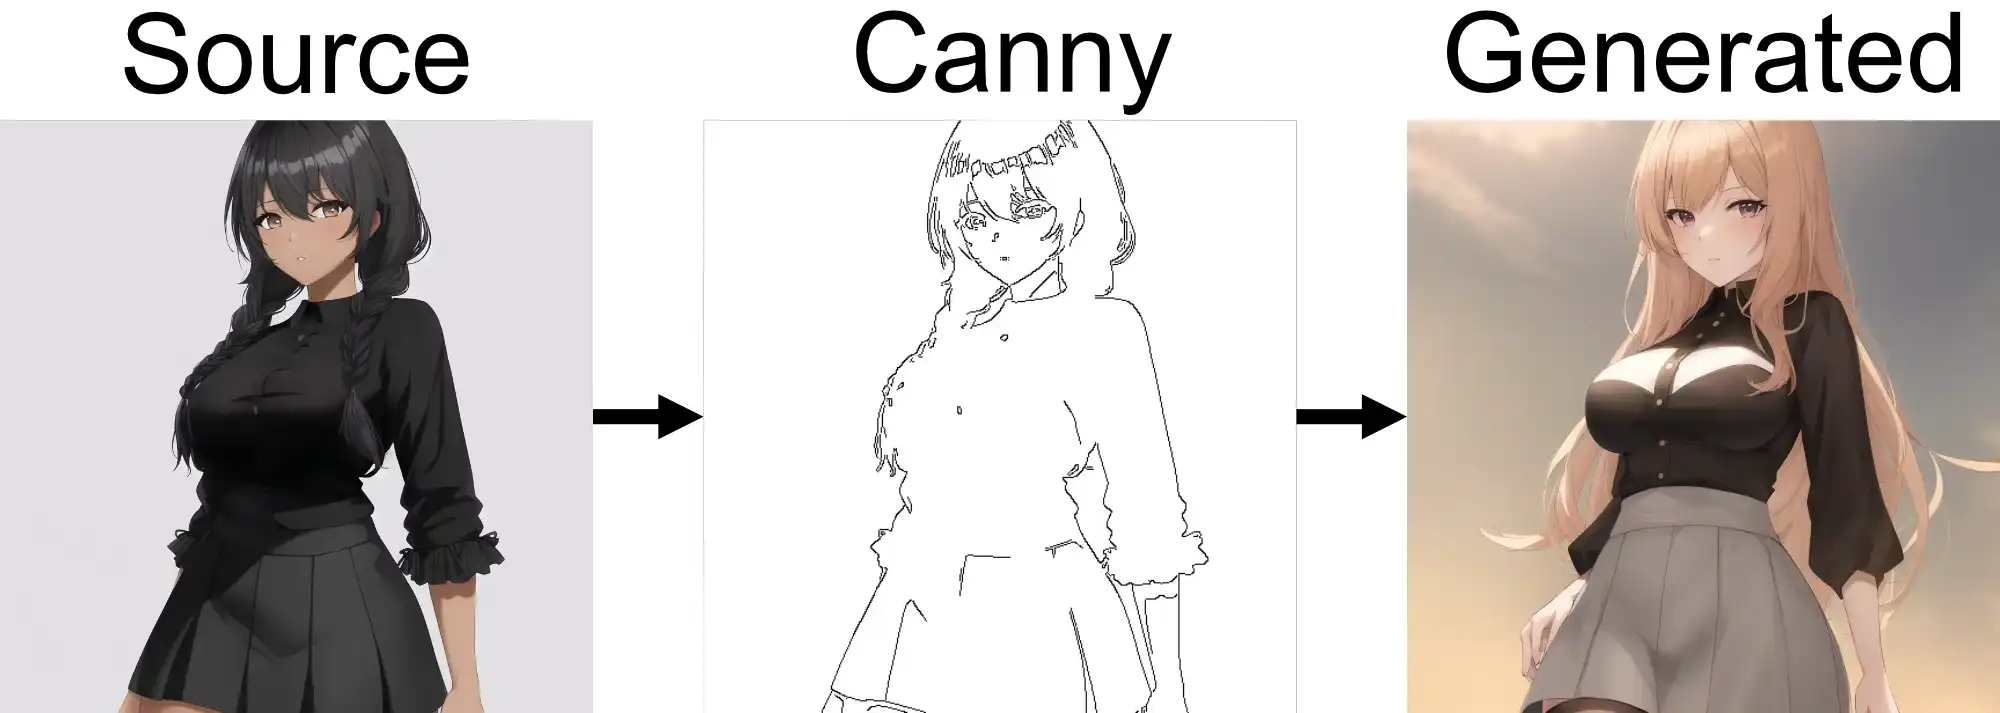
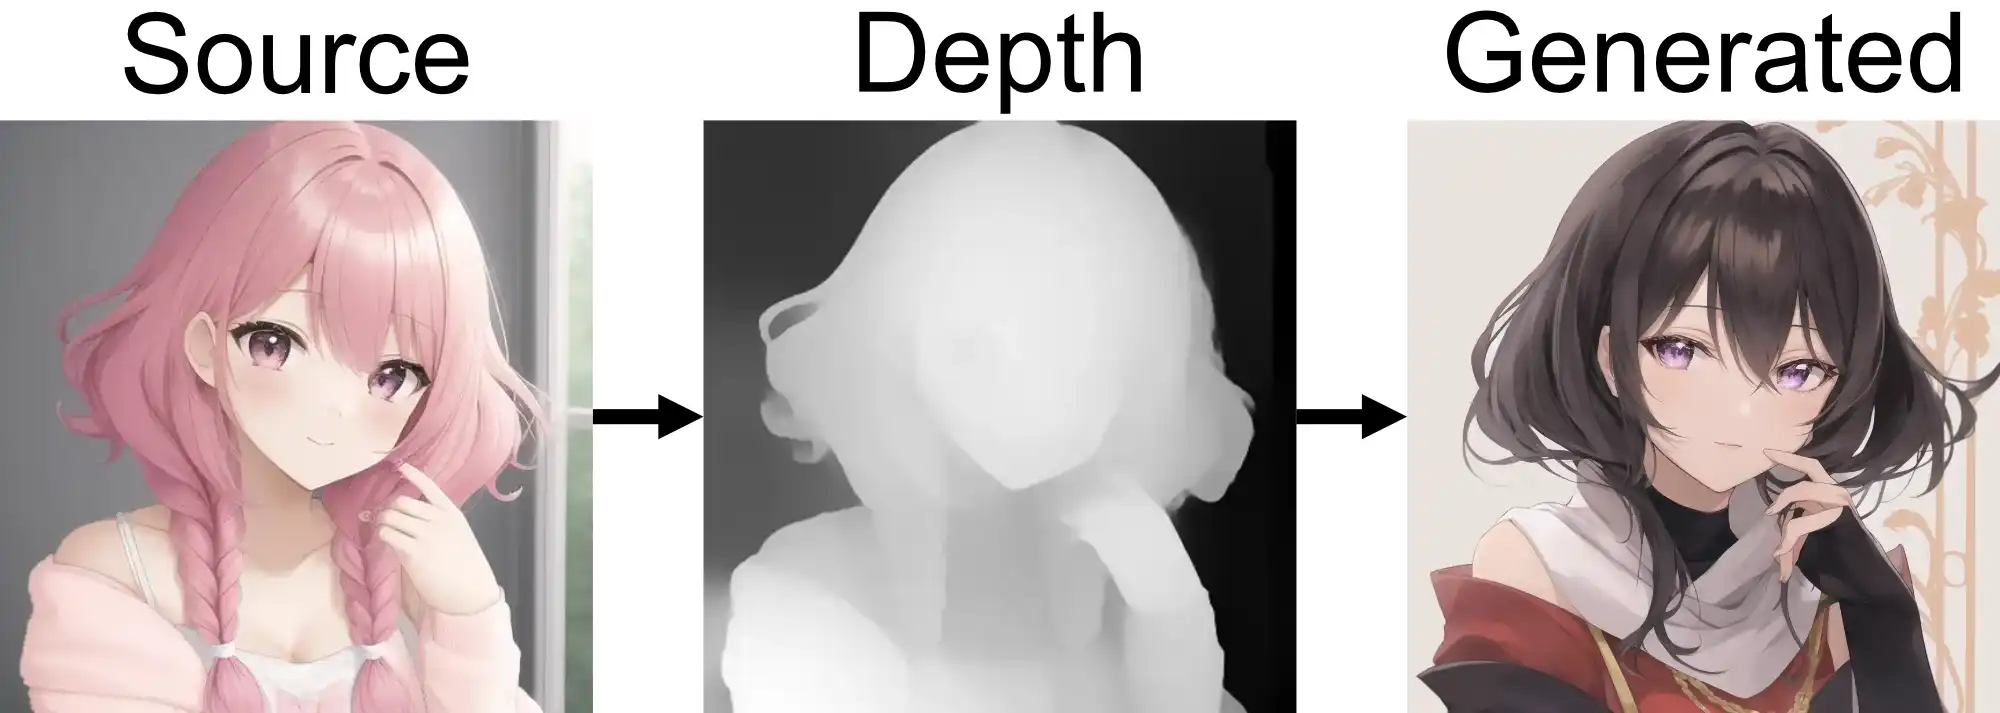
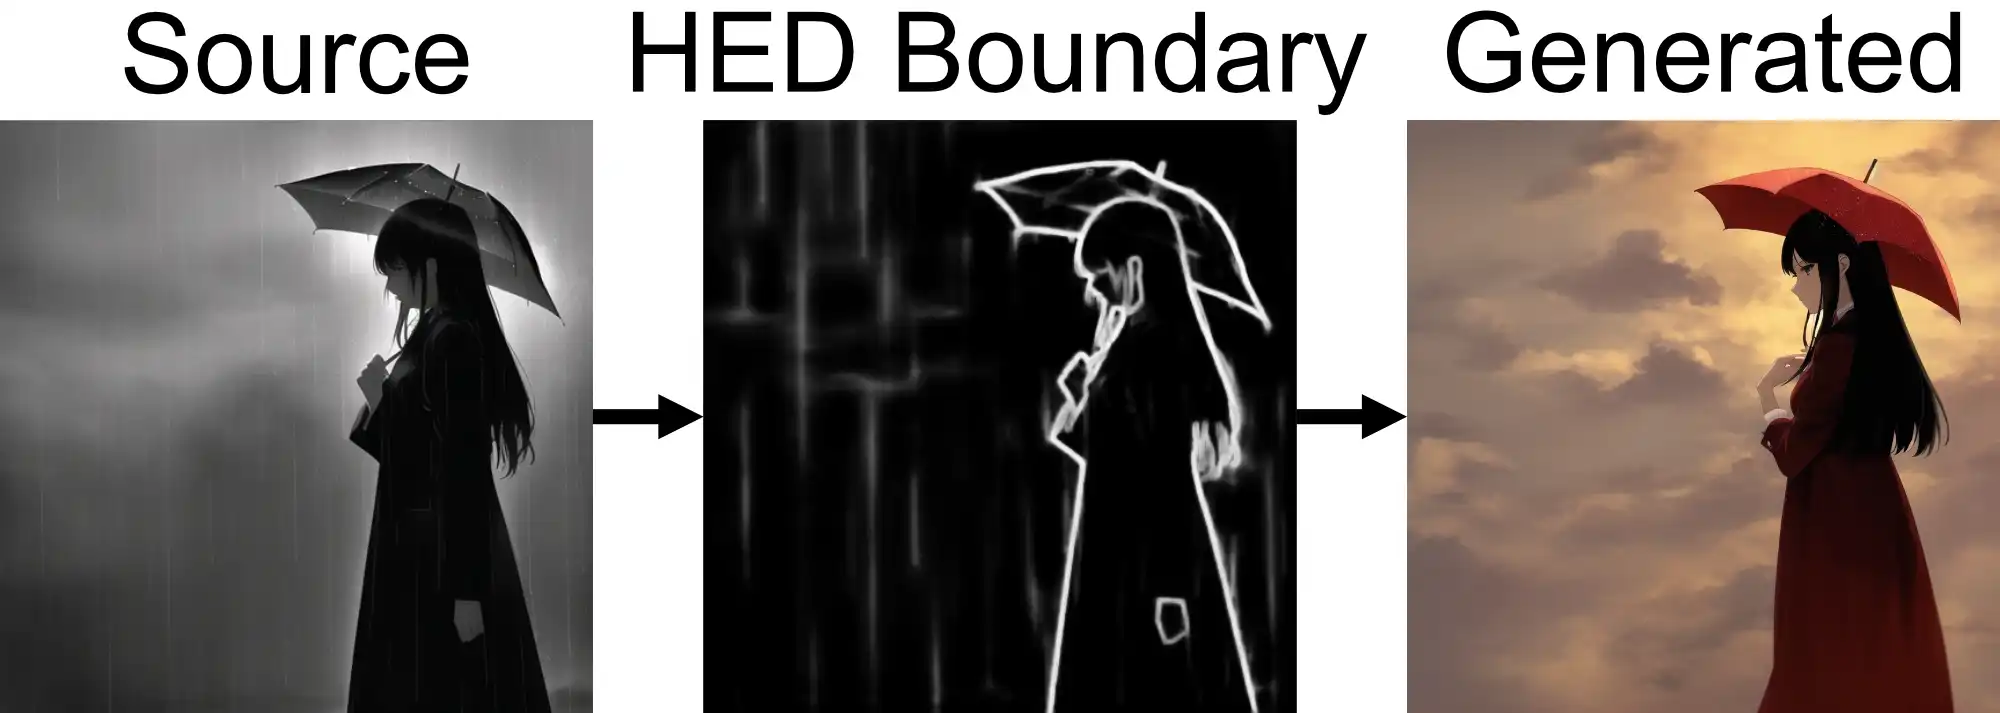
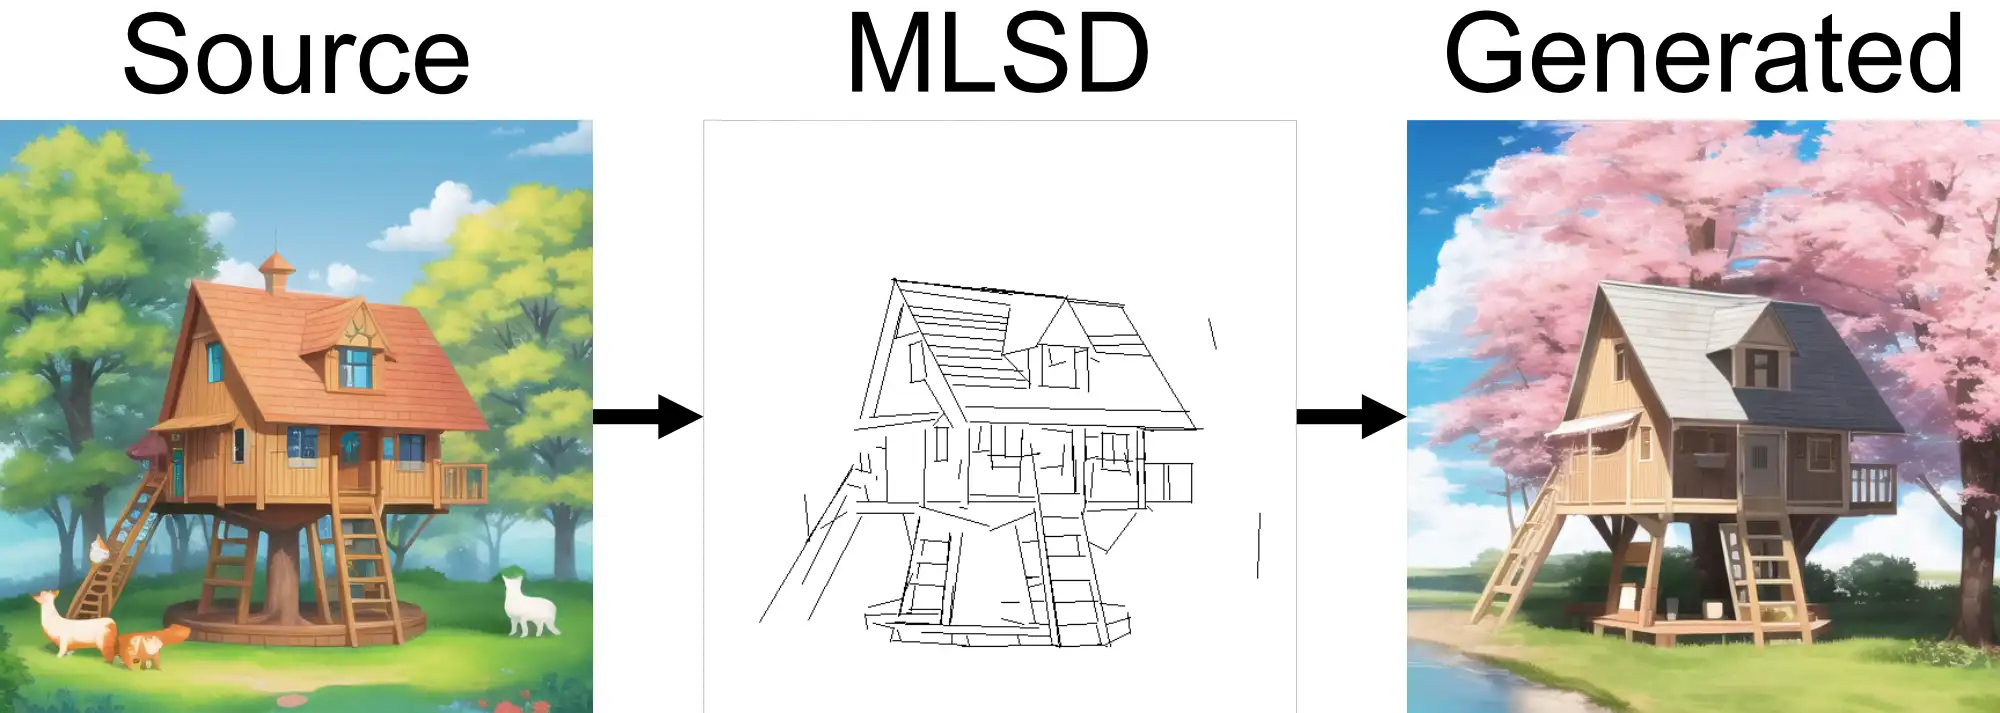
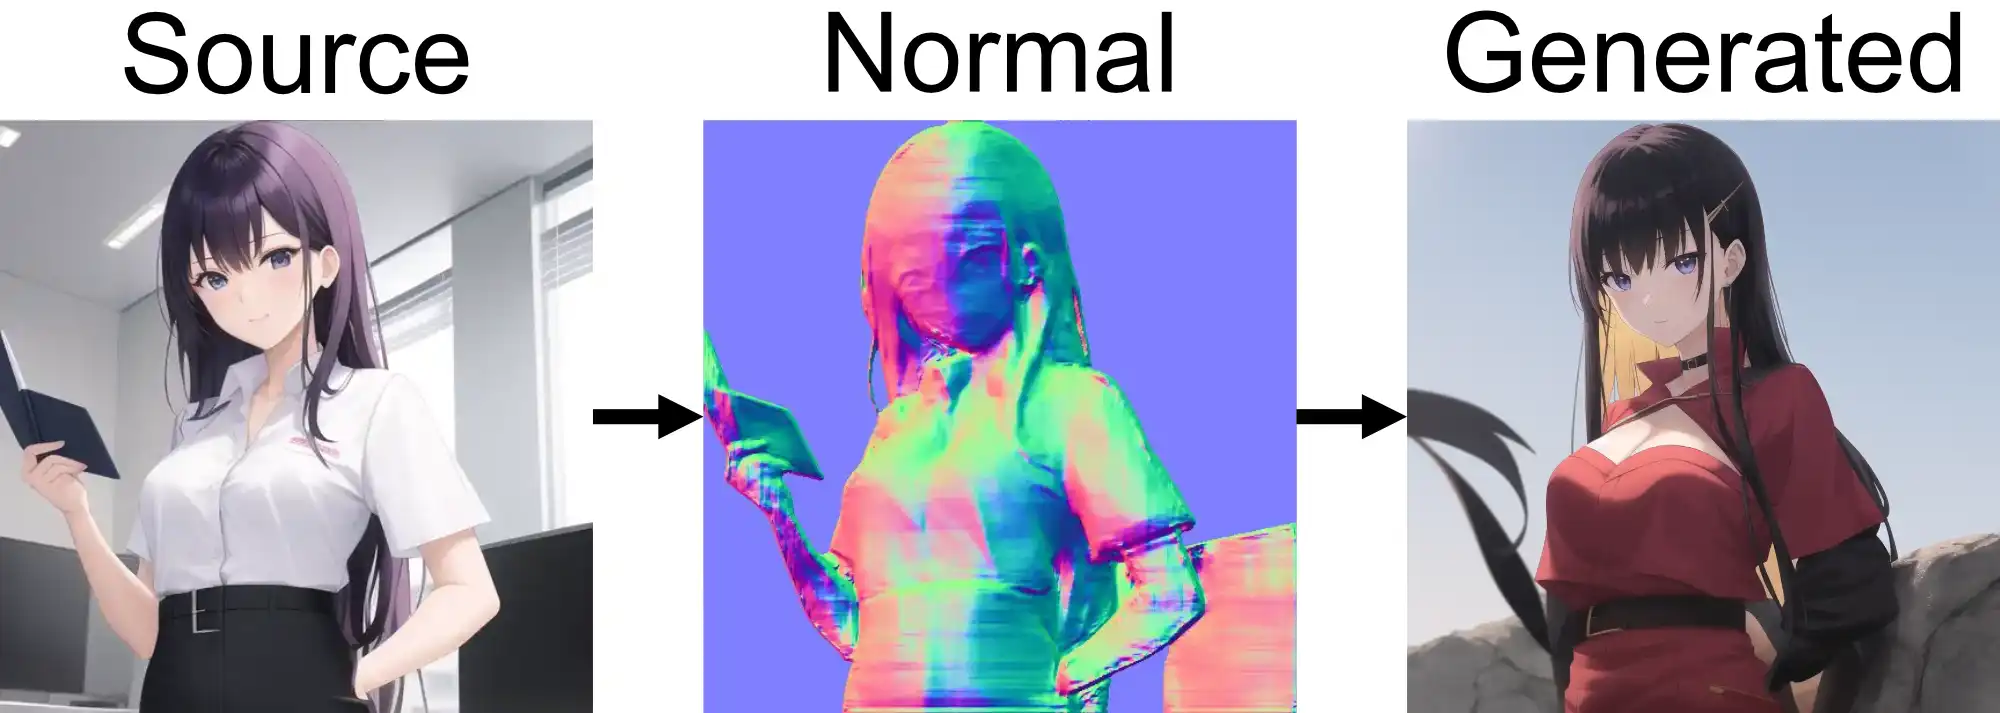
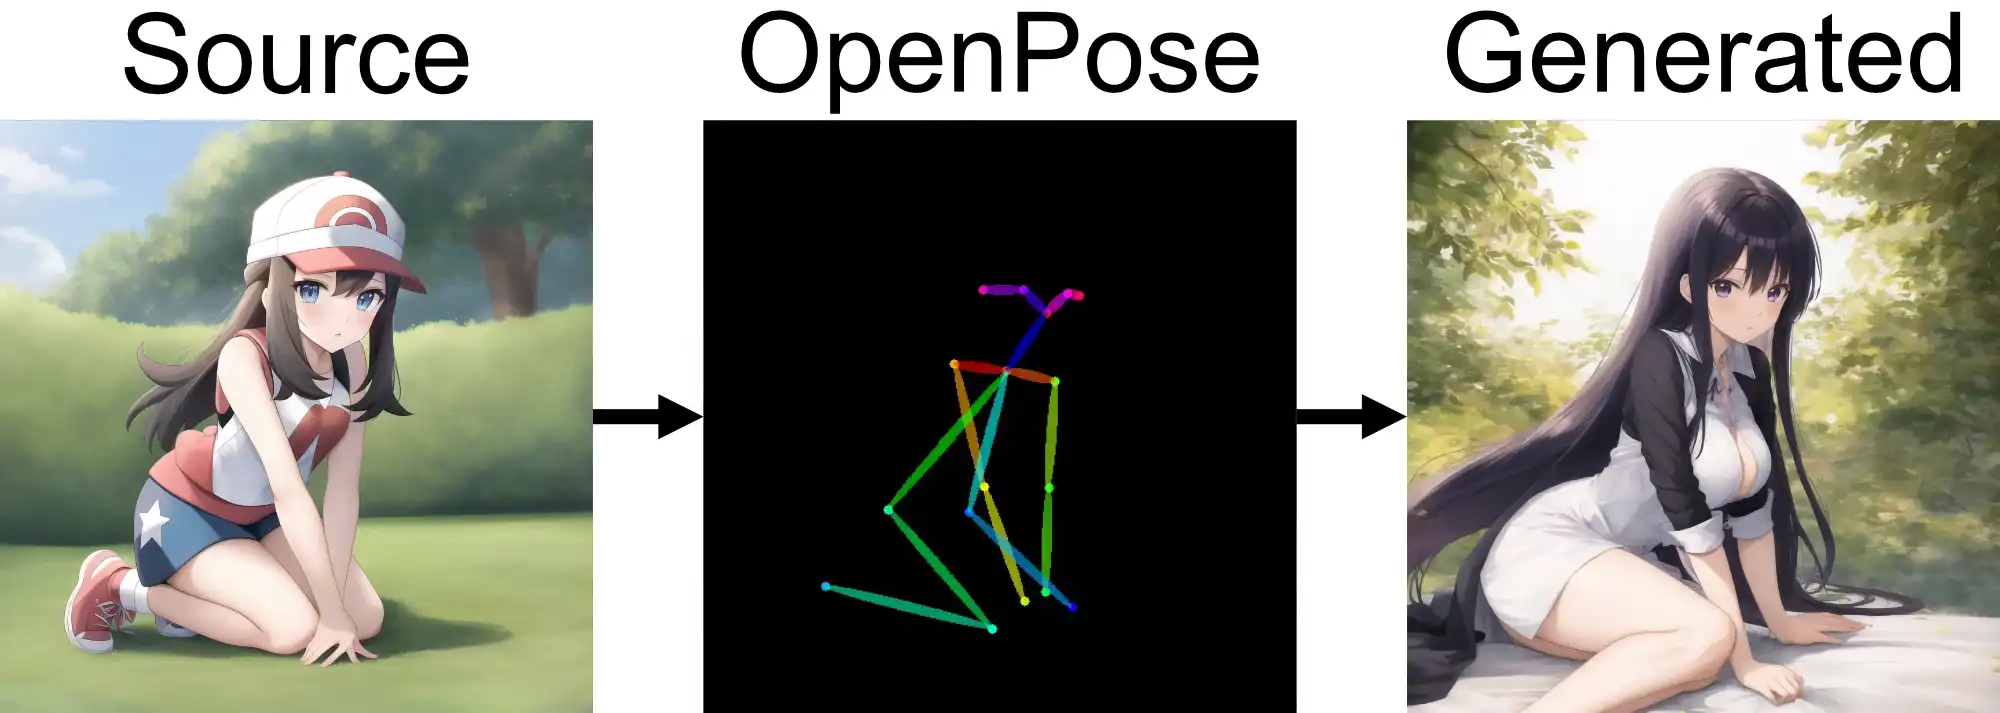
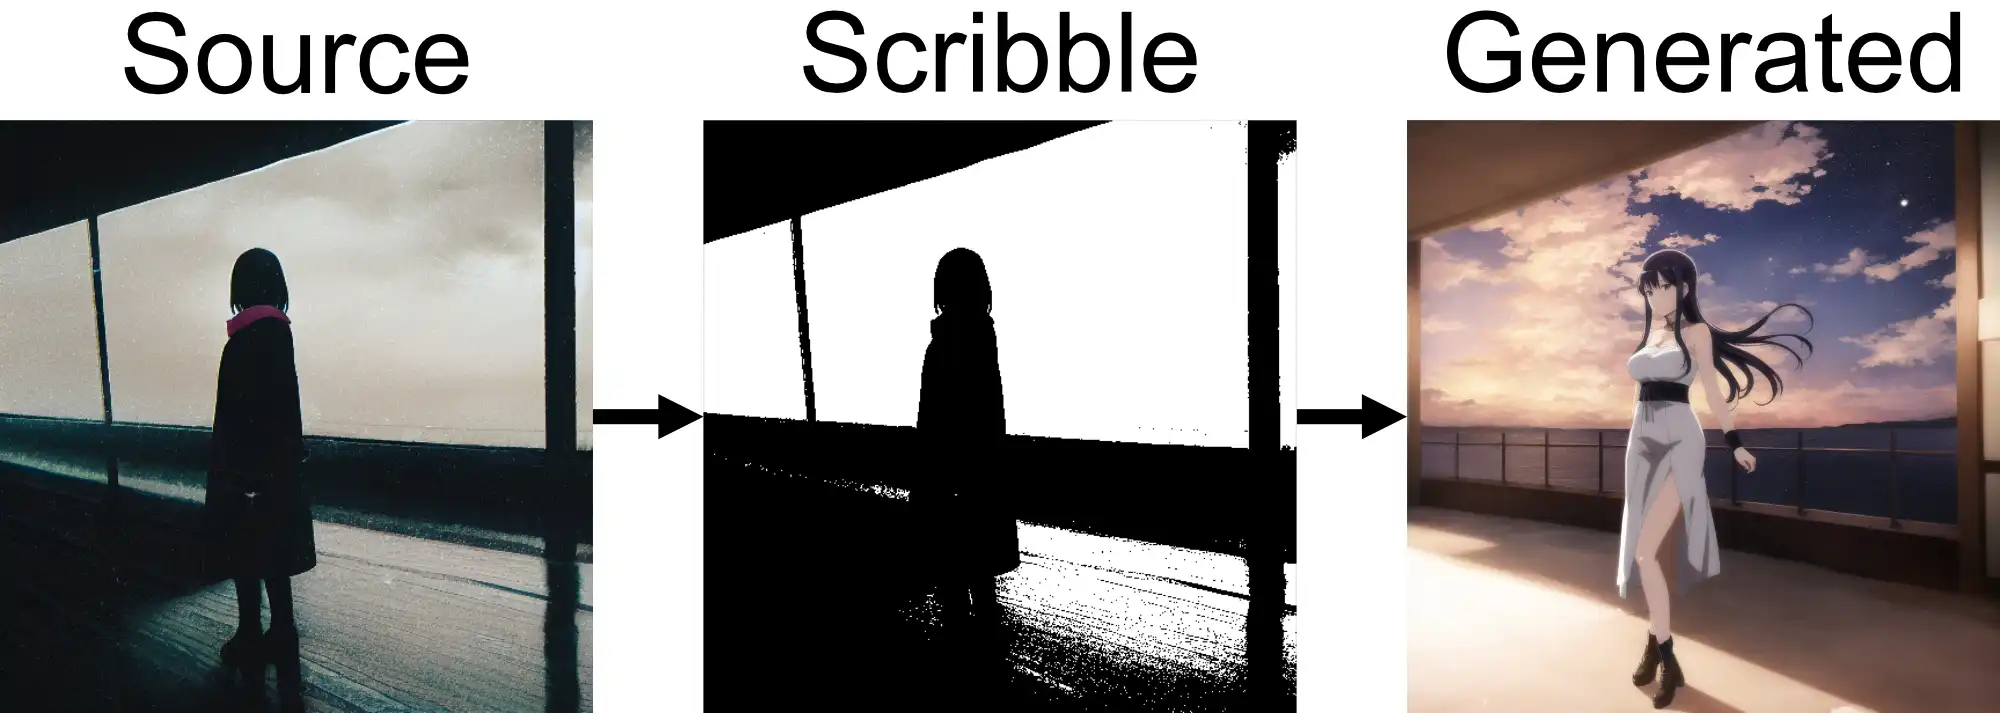
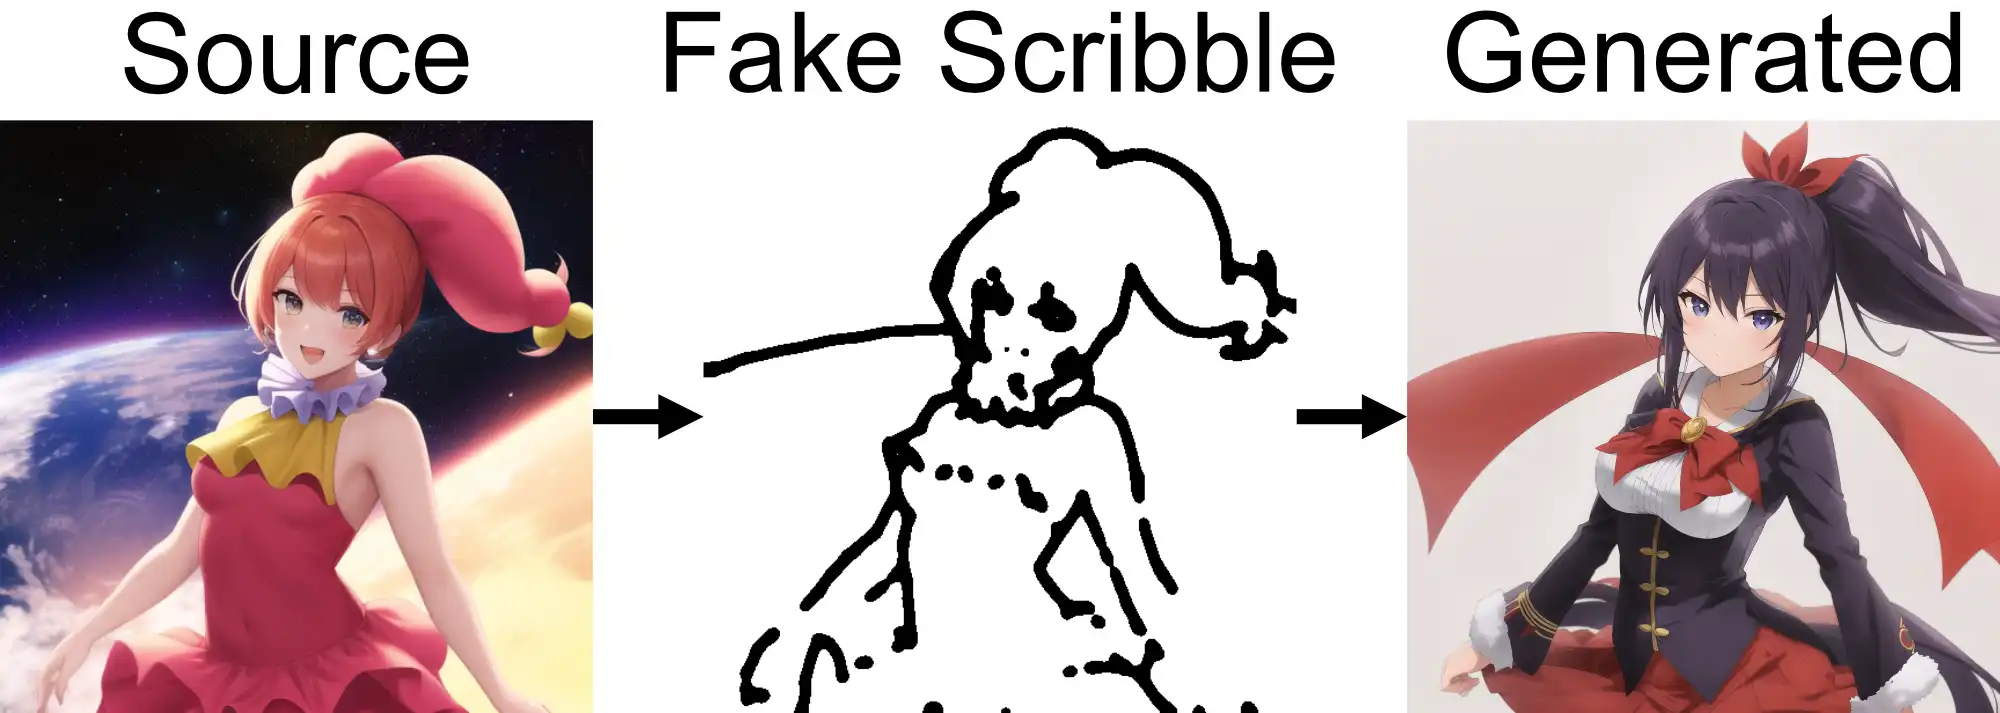
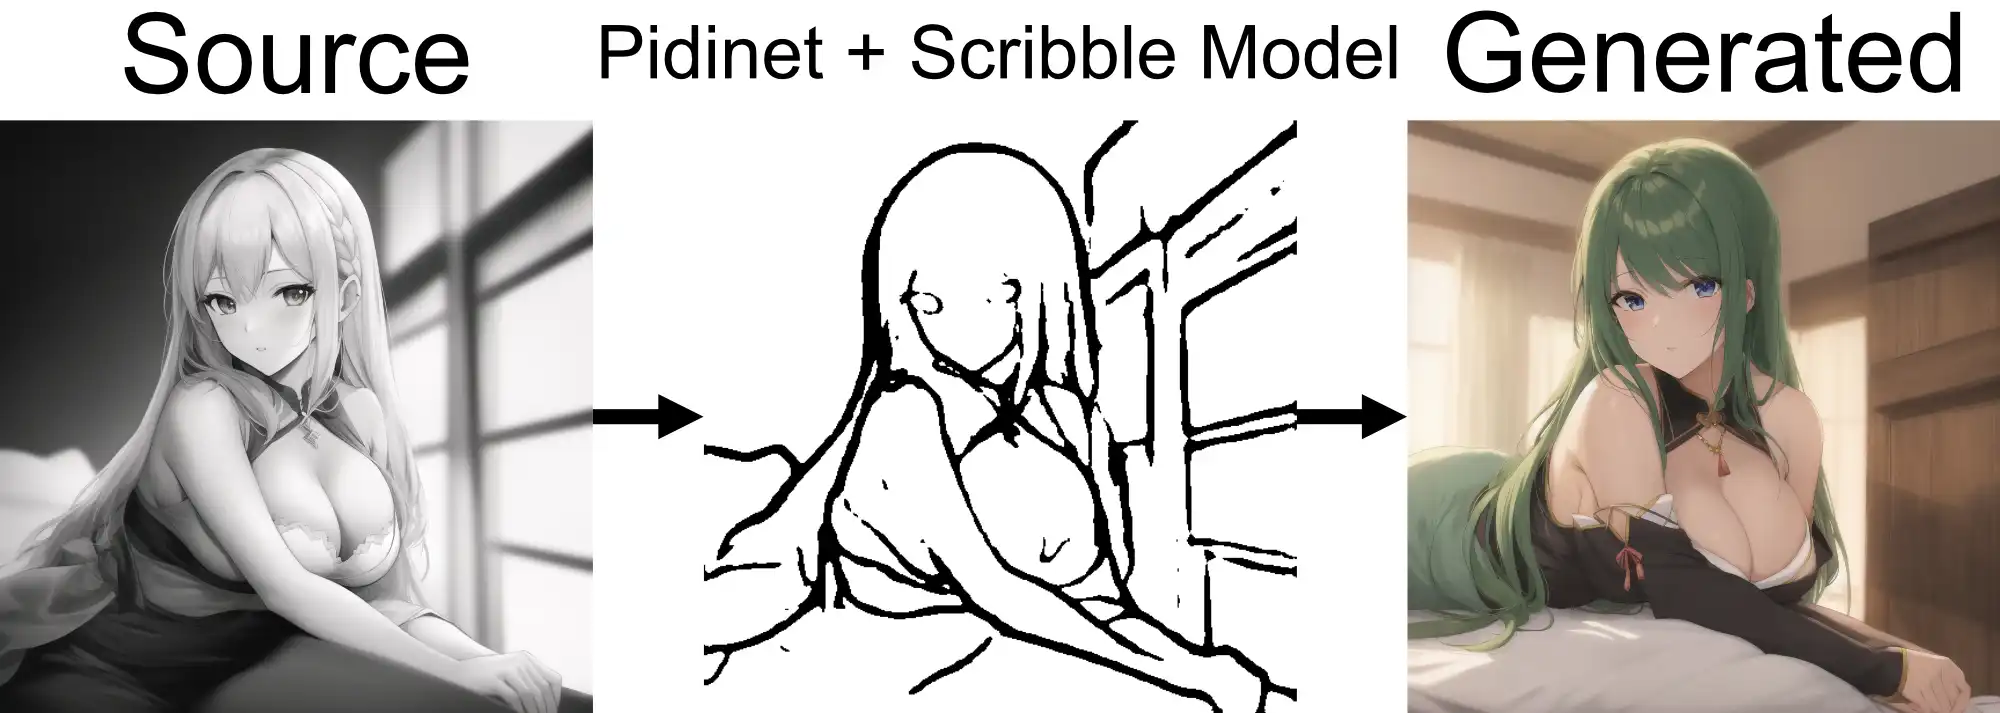
Model Examples
All examples below are using default parameters for Control Net, Hires Fix using the Latent upscaler x2, sampling method Eular a, sampling steps 80 and the HD-22 model.
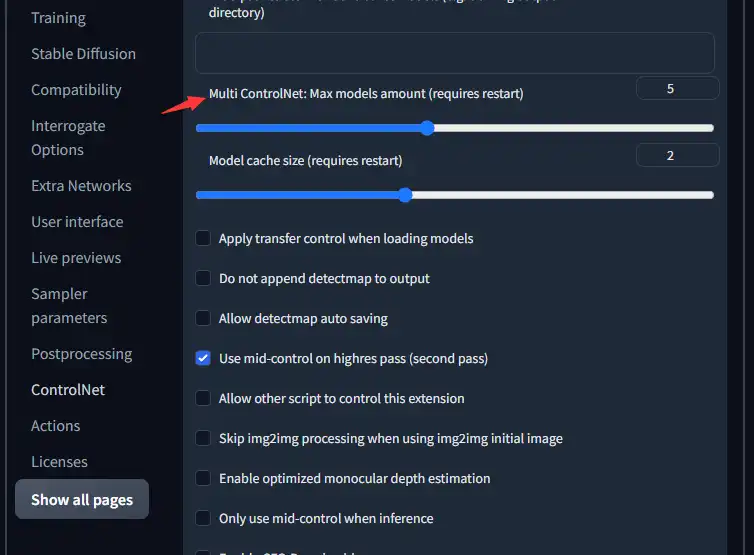
Multi-Control Net
Introduced on 23/02/2023, a new feature allows the use of multiple Control Net models at once, enabling a remarkable level of control over image generation and the creation of highly stable images, particularly useful for videos.
To use multiple Control Nets, enable this feature in the webGUI settings tab for Control Nets. As shown in the screenshot below, turn up the
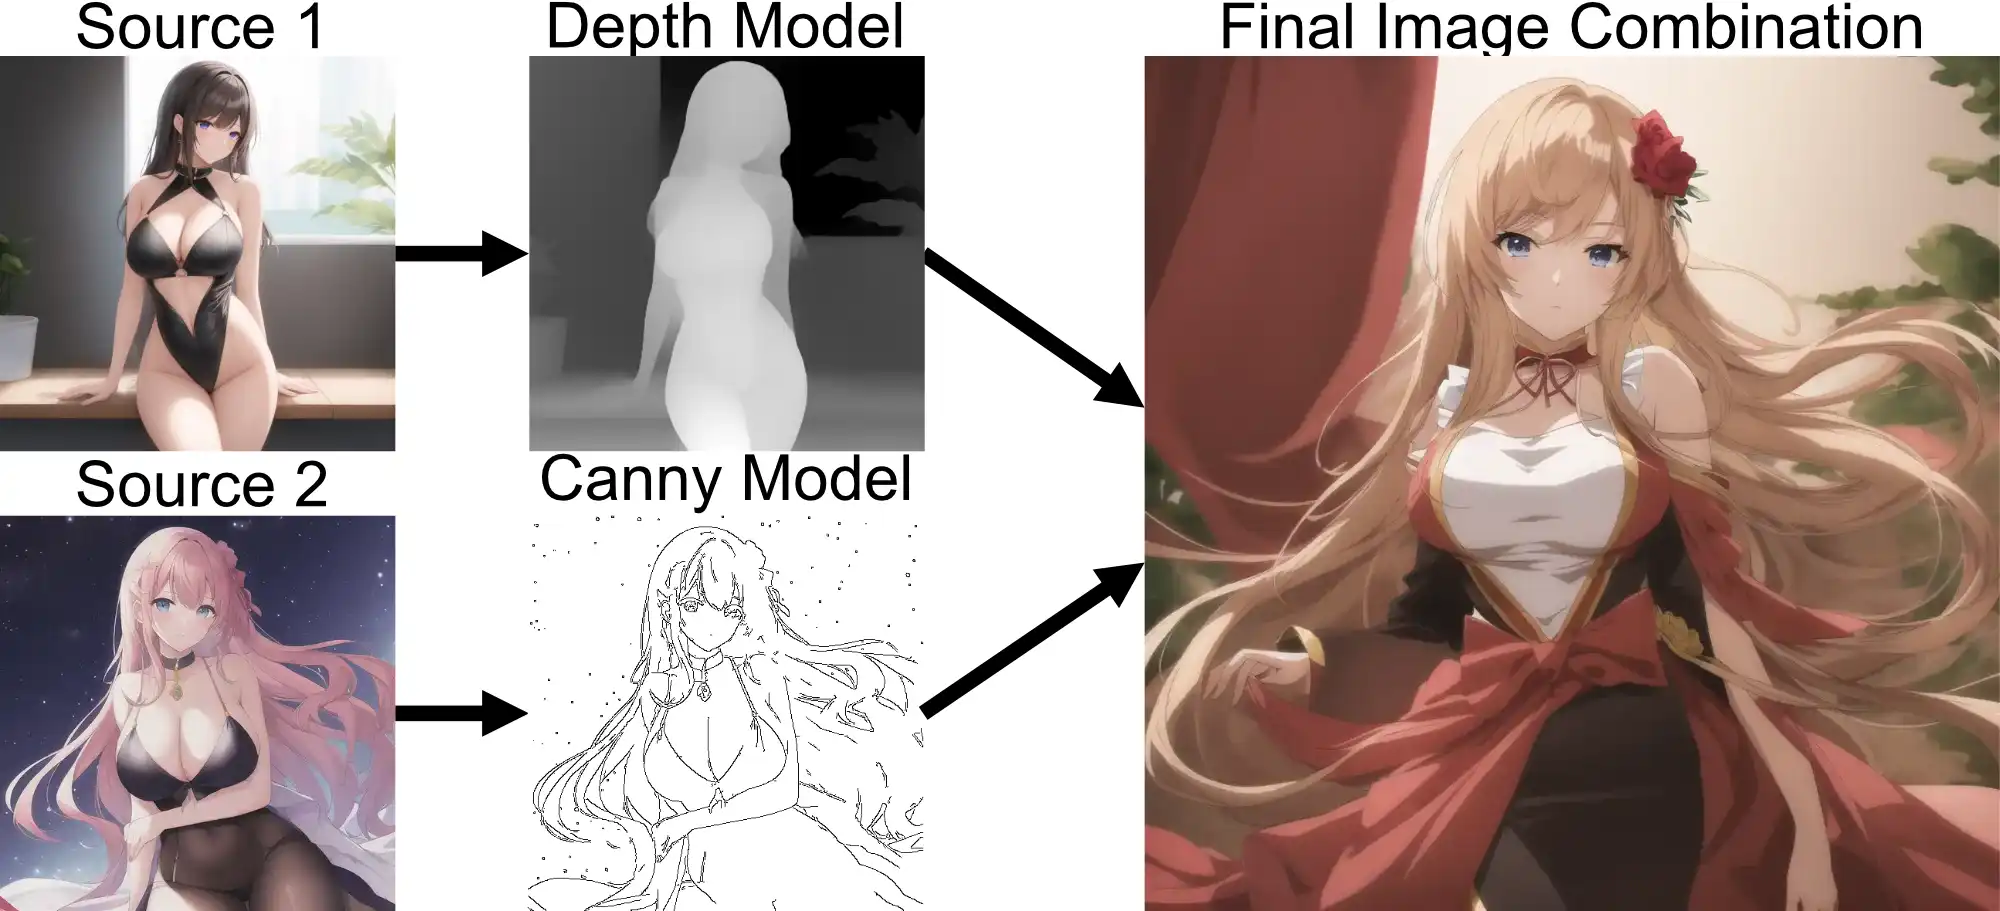
This multi-model setup allows for impressive and powerful results, including creating more stable images or mixing multiple source images into one final image.
You can also mix Preprocessors with non-matching Control Net models, however I haven't seen any reason to do that as yet.
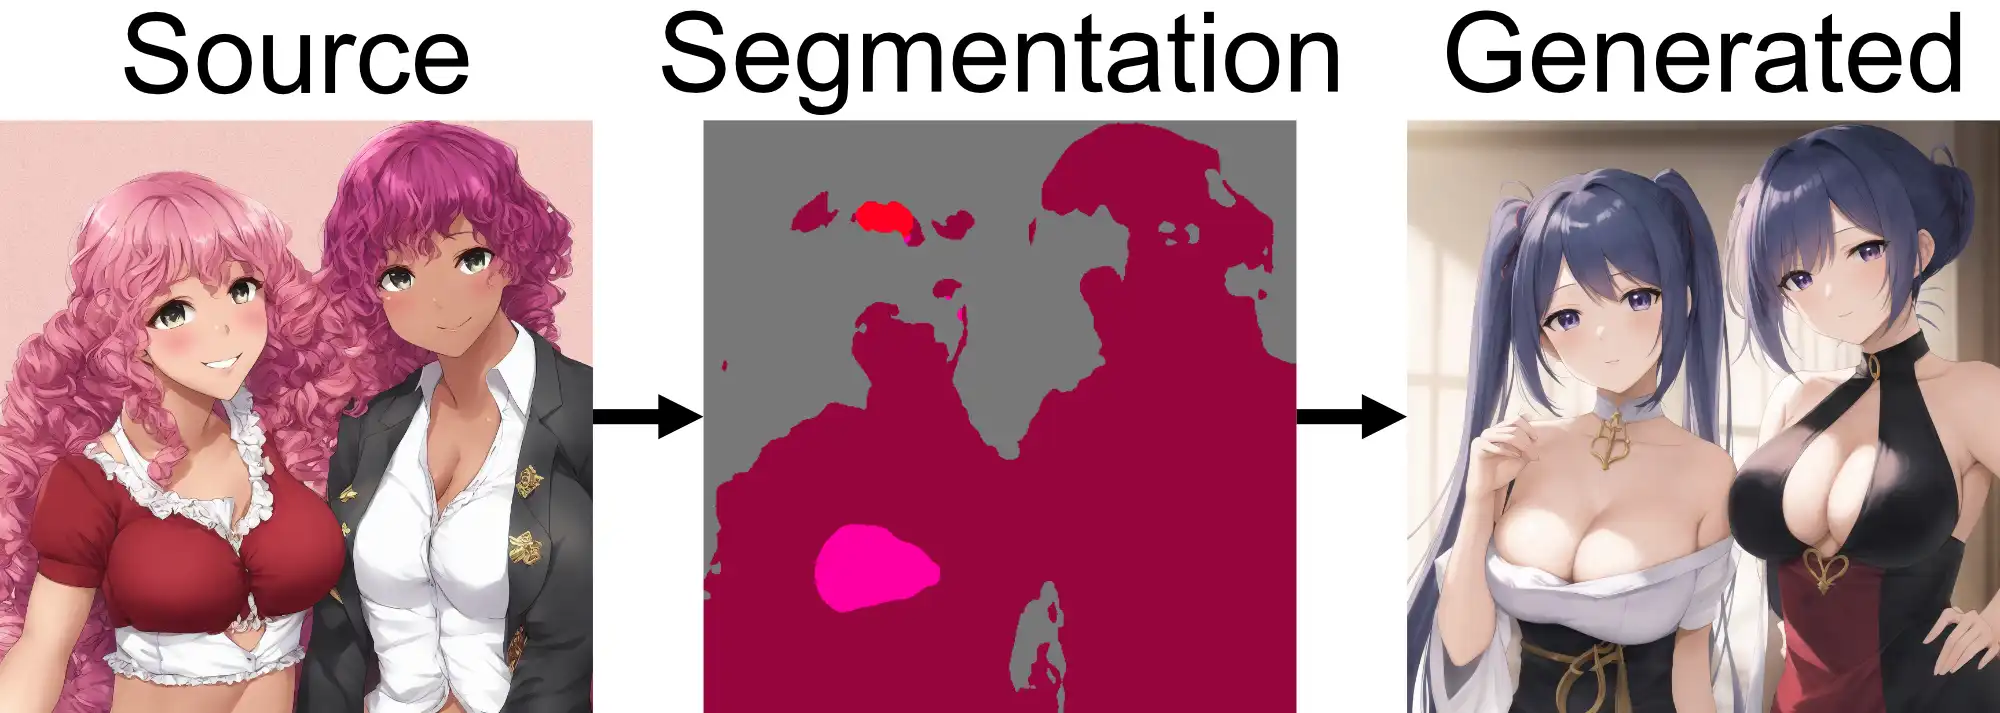
Mixing multiple source images examples
User Cases
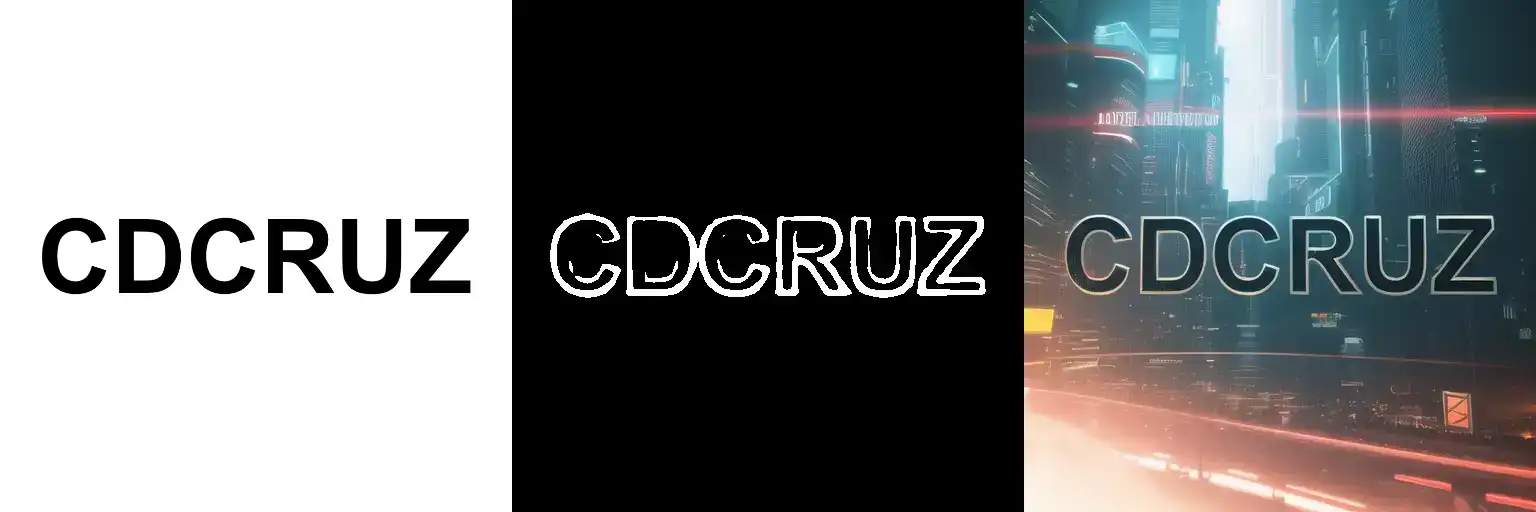
Text Art
One particularly exciting use case that is unique to current AI generation methods is the ability to use text as a source image and generate an image around the text. This approach enables completely legible text to be incorporated into your image generations, and it has shown very promising results.